I really like cranberries, like REALLY like them. S when I was out with several friends and a store had these white balls sitting Tudor people to eat and I popped one in my mouth to find outfit was a cranberry I was stoked! A new and delicious way for me to eat cranberries! I decided I had to recreate them.
My parents were coming up for Thanksgiving, and since they share the same love for them as well, what better time to try them.
So this is really quite easy as long as you do NOT burn the chocolate.
You will need:
1 16oz bag of white chocolate chips
1 bag of fresh cranberries
Tooth picks
Parchment or wax paper
Wash the cranberries and pull out any of the bad ones (soft, brown, etc) and dry them off.
Melt all the chocolate chips on LOW heat on the stove top, feel free to use a double boiler if you have one. I would recommend NOT using the microwave its too easy to burn part of the chocolate. You will know that you burnt the chocolate because it starts to get clumpy, almost like it isn't melting. It doesn't taste bad or smell bad like regular chocolate does when you burn it. It just won't be smooth.
Put tooth picks in the cranberries and dip them in. I leave a little showing at the top because I think it looks ore festive, and I think it looks weird to have a hole in the chocolate.
Put them on the paper and let dry, serve and enjoy!
This New Old House
Built in 1890 this old house has become our new house. My husband and I are restoring some of this house's original charm while adding updates. I love to have DIY projects. As many of the house projects as possible will be done by us.
Thursday, December 20, 2012
Monday, September 10, 2012
DIY: Front Door Help Tutorial
I have a VERY boring front door. I want to paint it navy blue, but have not gotten around to it. My quick fix was to add something on the door. Its not fully finished, but for now it will do.
I really like wreathes, but don't like the "attempt to look real" wreathes. I have an abundance of grape vines in the back yard and I am holding off making wreathes until I can prune them. So for now I made an "L" for the front door (L for our last name).
Materials:
Jute/Hemp or some sort of textured string, thicker works better
hot glue
wooden letter
scissors
This craft cost me under $10, and it took me less than 30 minutes. I have added some fabric flowers on the lower left side. Although Hubby says the flowers were too girly....
I really like wreathes, but don't like the "attempt to look real" wreathes. I have an abundance of grape vines in the back yard and I am holding off making wreathes until I can prune them. So for now I made an "L" for the front door (L for our last name).
Materials:
Jute/Hemp or some sort of textured string, thicker works better
hot glue
wooden letter
scissors
 |
| Take your letter and admire how boring it is right now... |
 |
| Since there is some thickness to the letter I glued strips of the hemp on the top part. I alternated the strips so when I started on the wrapping it wouldn't be uneven on one side. |
 |
| When you start to wrap start as close as possible to the top.cover the ends of the top strips. At the beginning you will want to use more glue, just so you know that it is secure. |
 |
| this is the boring part just wrapping and gluing. The part you need to pay attention to is the "slopey" part of the letter. Use lots of glue when doing this (not so much that is shows). |
 |
| continue with the strips on any part that you can't wrap evenly. |
 |
| (another picture with the "strips") |
 |
| Here is mine completely done. I went over it twice (besides the part that needed the strips). I did this because it just looked too thin. |
 |
| There it is hanging up! It will look much better against a navy blue door, don't you think? |
This craft cost me under $10, and it took me less than 30 minutes. I have added some fabric flowers on the lower left side. Although Hubby says the flowers were too girly....
DIY: Dry Erase Wall Calendar Tutorial
Hubby and I have don't have a very regular work schedule and we are constantly asking each other what the other one is doing. Hubby wanted a big wall calendar, but I could never find one that I liked, and I always struggled with remembering to but one before the first of the year. Our wonderful carpenter did such a great job of following through with all of my random requests for our house, one of the last things he did before he left was put in a little table/shelf/counter by our back door. It was a perfect to try and keep hubby and myself on top of communicating and organized.
After seeing this idea on pintrest (best/worst site ever) I decided to try it out. I really like how it turned out and it cost under $10 to make)
Materials needed:
A picture frame with glass
Paint swatches from the hardware store
Glue
Ruler
Pencil
scissors
Hammer/Nails to hang it
Dry erase marker (to write on the glass when you are done)
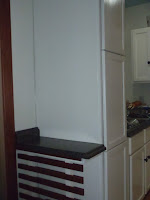
See how sad that area was by the back door? It looks so much better with it up, and of course my birch bark pencil holder. Hubby and I now have a "command center."
I hope you enjoy making this as much as I did, and whoever thought a picture frame, free paint swatches and a dry erase marker.
After seeing this idea on pintrest (best/worst site ever) I decided to try it out. I really like how it turned out and it cost under $10 to make)
Materials needed:
A picture frame with glass
Paint swatches from the hardware store
Glue
Ruler
Pencil
scissors
Hammer/Nails to hang it
Dry erase marker (to write on the glass when you are done)
 |
| Gather all of your materials and lay it out, I struggled at first to find the size frame I wanted that would fit where I wanted it because of the space I had to hang it |
 |
| Cut the paint swatches up |
 |
| measure out the space of what you have with your frame you will need 7 columns and 6 rows, plus one for the top for the name of the month. |
 |
| Lay it all out and glue it on. I had a left over paint swatch so I put it at the top for the month name |
 |
| put it back together |
See how sad that area was by the back door? It looks so much better with it up, and of course my birch bark pencil holder. Hubby and I now have a "command center."
I hope you enjoy making this as much as I did, and whoever thought a picture frame, free paint swatches and a dry erase marker.
Labels:
Calendar,
Craft,
DIY,
Do It Yourself,
Dry Erase Board,
Family,
organize
Friday, July 20, 2012
A picture is Worth a Thousand Words
These are long over due, and my creative ideas for an entry are slacking right now. So with little words and mostly pictures these are some old update pictures... There should be newer ones soon....
and besides who doesn't enjoy a good picture book from time to time ;) enjoy!
The picture above and below are of the kitchen just after the floors were done and uncovered
(still no appliances)

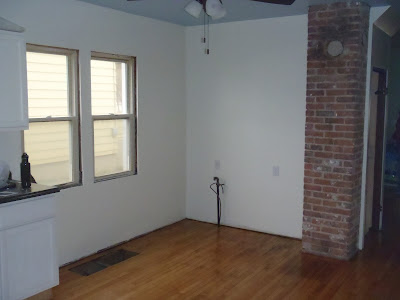
Family room/dinning room. Picture to the left is looking back into the kitchen, and the ones below are looking into the family/dinning room from the kitchen.
Left is the entryway (and a very dirty front door)
Below is the guest bedroom. The picture on the left is before the carpet went in, and the picture below and to the right is after the carpet went in. (notice the dog being so good and not stepping on the new carpet). The carpet is made from corn and is chemical free :)


These pictures are of the master bedroom. To the left is looking at the closet with no carpet. To the right is the closet with no carpet. Our amazing carpenter built the closet out of scrap wood from another house he has been working on. I love using stuff that would have been burned or tossed!

To the lrft is the master bedroom with the new carpet.
The dog in the master bedroom. How good is she to know that she was not allowed on the new carpet yet?!
More pictures to come!
and besides who doesn't enjoy a good picture book from time to time ;) enjoy!
The picture above and below are of the kitchen just after the floors were done and uncovered
(still no appliances)

Family room/dinning room. Picture to the left is looking back into the kitchen, and the ones below are looking into the family/dinning room from the kitchen.
Left is the entryway (and a very dirty front door)
Below is the guest bedroom. The picture on the left is before the carpet went in, and the picture below and to the right is after the carpet went in. (notice the dog being so good and not stepping on the new carpet). The carpet is made from corn and is chemical free :)


These pictures are of the master bedroom. To the left is looking at the closet with no carpet. To the right is the closet with no carpet. Our amazing carpenter built the closet out of scrap wood from another house he has been working on. I love using stuff that would have been burned or tossed!

To the lrft is the master bedroom with the new carpet.
The dog in the master bedroom. How good is she to know that she was not allowed on the new carpet yet?!
More pictures to come!
Wednesday, April 4, 2012
Attack of the yard
The back yard... This was and still is going to be a long long project... Like the rest of our house it has potential, I feel like that is the story of my life.
Recently Hubby found out the history about the house. Well recent history that is. The people who had it last inherited it from their mother. From what we have pieced together from the neighbors and from doing some internet/facebook searches it was the Mom who cared about the yard, and her daughter/son-in-law not so much. From what the neighbors said the back corner was turned into an outdoor car garage.
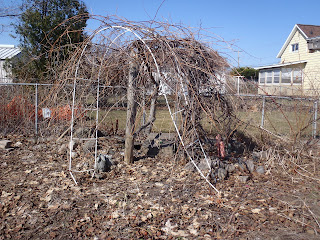
Thank goodness for my parents coming to visit and helping get the backyard in order. A large section of the back fence was missing, fixed. The grape vines had not been pruned and were crushing a wire arch, pruned and redirected. The random orange fence, gone. The partial fenced area, gone. New grass seed, planted. invasive species that threatened to take over, gone.
looking into the back corner of the yard. That's the random fence, and the corner of the garage
looking to the back right hand corner
grape vines crushing the arch and over top of the pond.
Raspberry bushes and the back of the garage
standing in the middle back of the yard looking at the house.
Updated pictures to come! Thank you so much Mom and Dad for all of your hard work and showing us what a great yard we can have!
Friday, March 23, 2012
Kitchens
We have our kitchen completely painted! First room to be ready to be filled! Hubby and I are so excited.
Friday, February 10, 2012
And Don't Forget Your Dust Mask!
What a week! Hubby is gone away on business so its me, the dog and the new old house.... Thank goodness for our amazing carpenters! Holy wah are they moving fast! On Monday the carpenters were going to widen a door way. That was really all they were suppose to do. I left to go check in on something for work, came back two hours later and the door was widen and they were looking for more projects. Drum roll please.....
Hello new closet!!! WAHOO!
They also took out a header (I think that's what its called) that was in front of the basement door. Note the yellow circle....
this is looking into the kitchen from the entry way.
Since they were moving so quickly and looking for projects until the drywall got there they found some projects for us to do. We took out the lath and plaster on 5 walls, and two ceilings. 1 ceiling, and 3 of the walls were taken out in one night, and let me tell you it was a long night! The others were taken out the next night, after the hubby had left on his trip.
We discovered a lot by opening up those walls, things like a vent had two holes in it, our load bearing wall was missing several support beams, and other fun things like that. Our carpenters now have more work. Thank goodness they are amazingly fast and fun to be around!
These were two dusk masks after switching them out once during the process being compared to an unused mask. I will ALWAYS wear a dusk mask after seeing this comparison.
Hello new closet!!! WAHOO!
They also took out a header (I think that's what its called) that was in front of the basement door. Note the yellow circle....
and say goodbye to it! (It was hollow inside fyi)
Since they were moving so quickly and looking for projects until the drywall got there they found some projects for us to do. We took out the lath and plaster on 5 walls, and two ceilings. 1 ceiling, and 3 of the walls were taken out in one night, and let me tell you it was a long night! The others were taken out the next night, after the hubby had left on his trip.
good bye wall
good bye kitchen ceiling
We discovered a lot by opening up those walls, things like a vent had two holes in it, our load bearing wall was missing several support beams, and other fun things like that. Our carpenters now have more work. Thank goodness they are amazingly fast and fun to be around!
These were two dusk masks after switching them out once during the process being compared to an unused mask. I will ALWAYS wear a dusk mask after seeing this comparison.
Subscribe to:
Comments (Atom)


